Import Map Setup
An Import Map is used to translate any chart of accounts to the client master chart of accounts used in RealPage AIM. Each account on the internal chart is associated with one of the accounts on the RealPage AIM common chart. The import map may be manually created in the AIM platform or may be created in Microsoft Excel and imported.
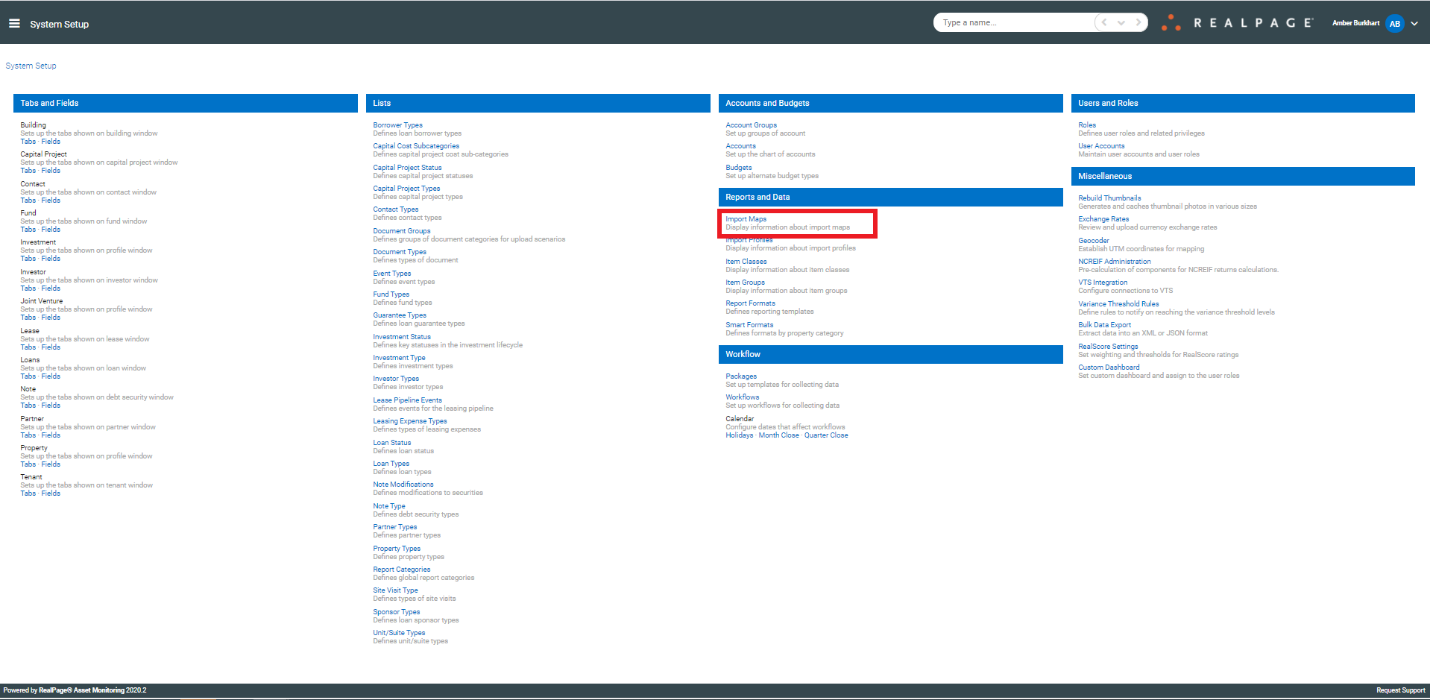
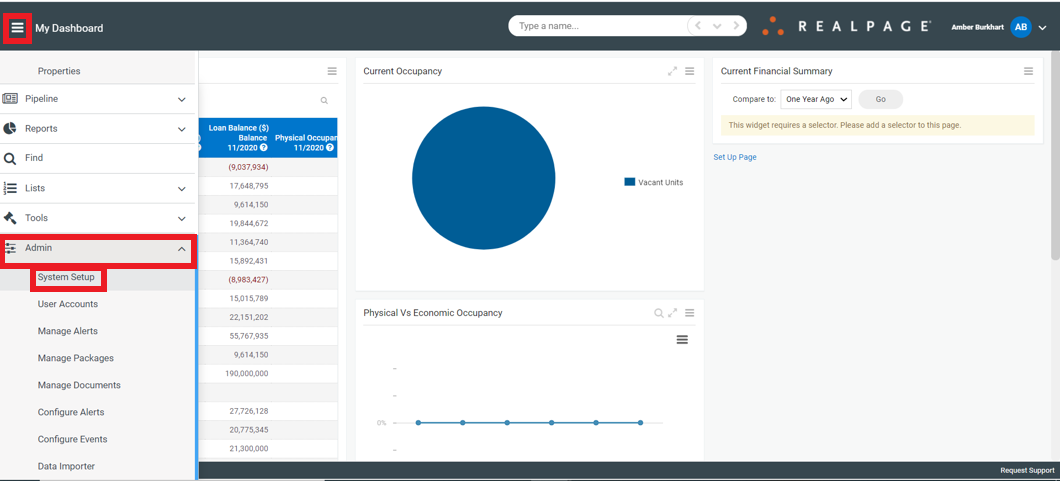
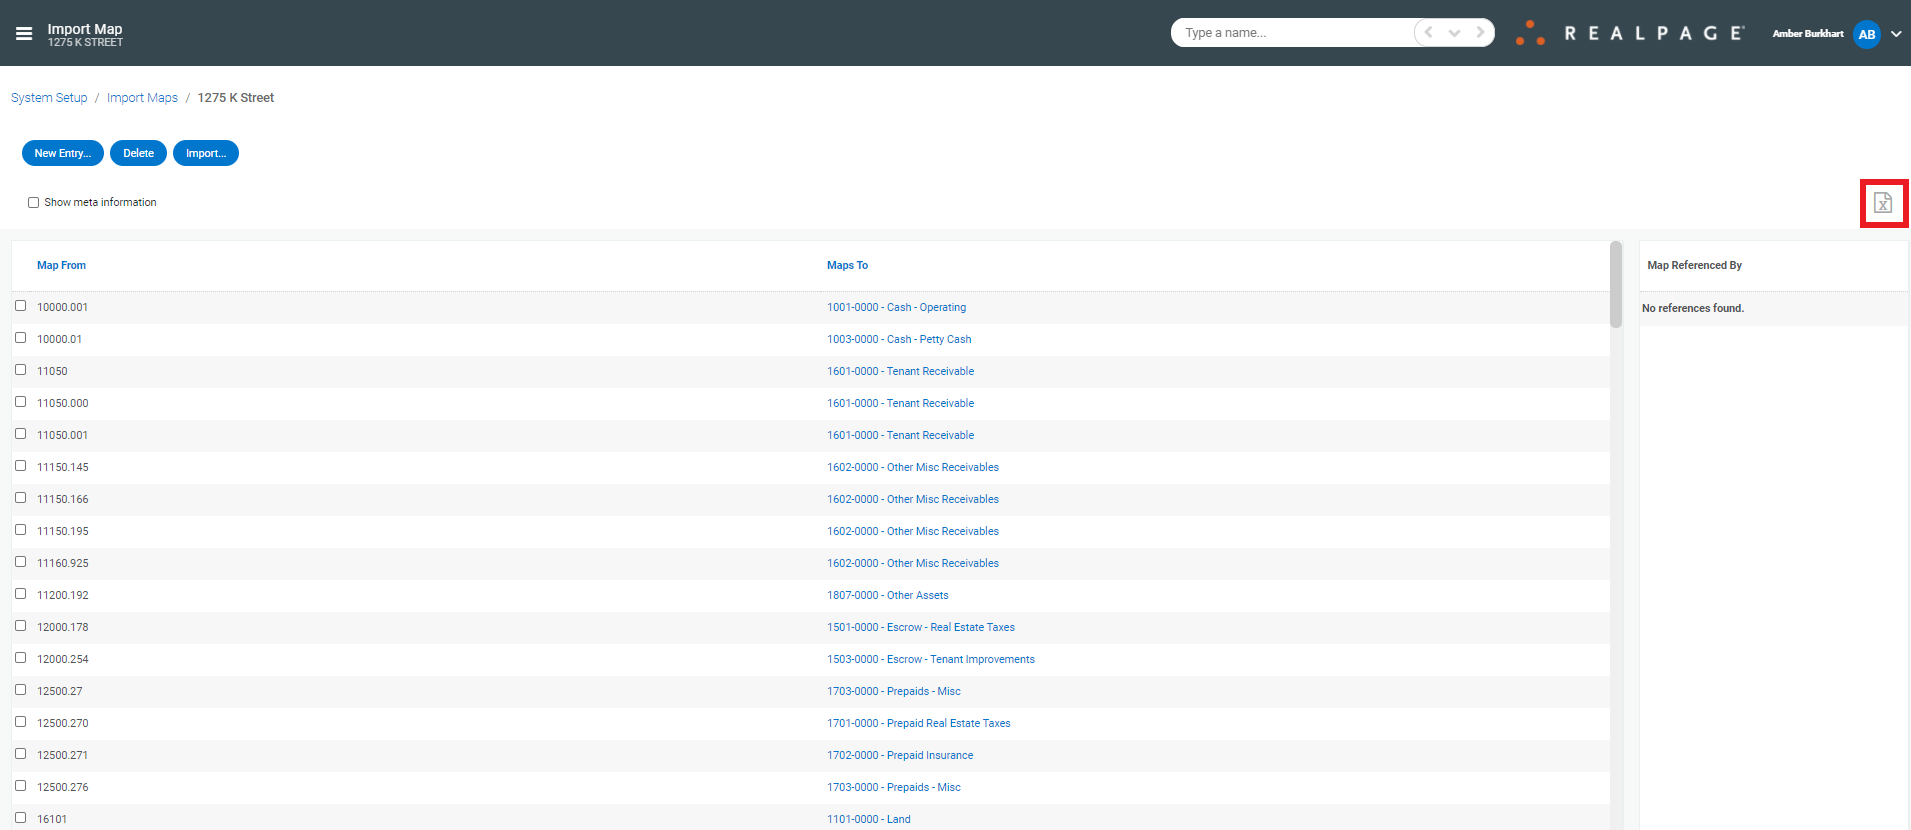
- Select the “Import Maps” link on the System Setup screen to display the list of existing import maps
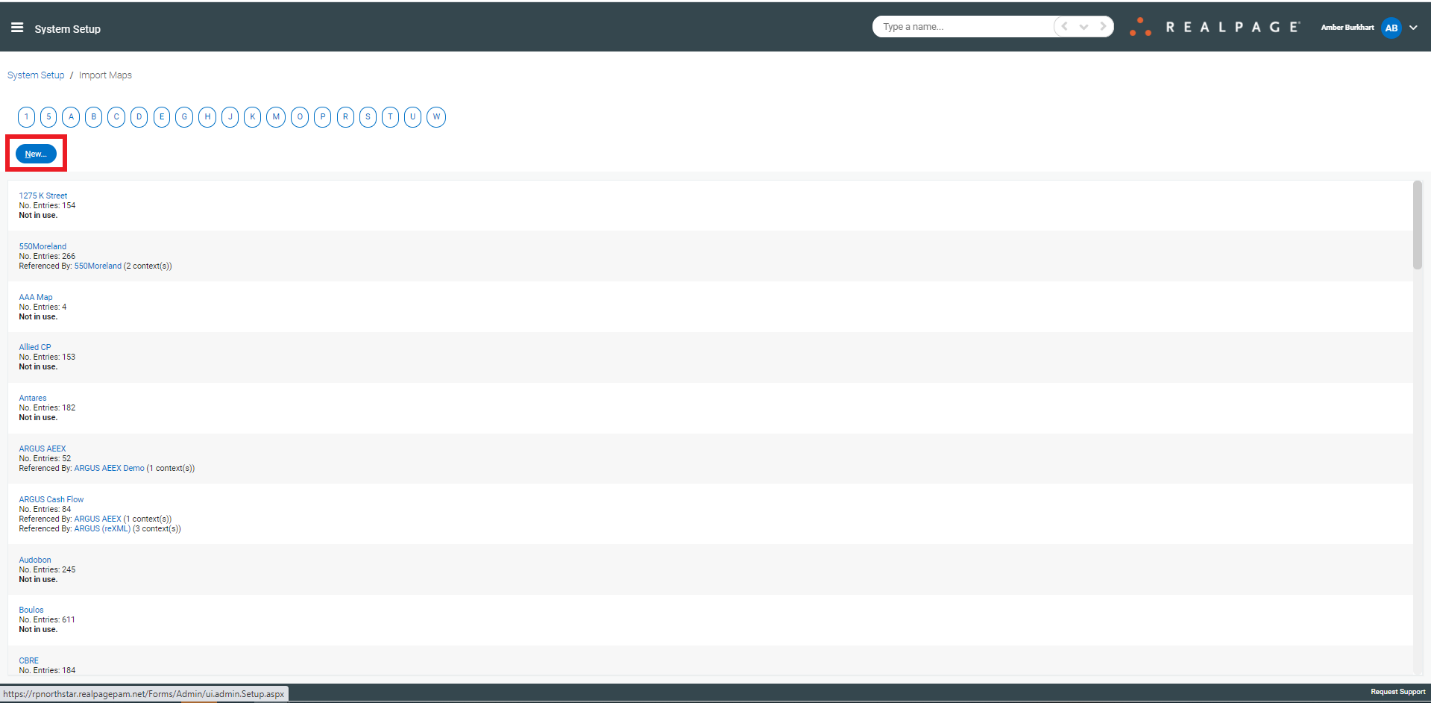
- Create a new import map by selecting the “New…” button on the bottom of the page or edit an existing import map by clicking on the name of a map in the list.
 Scroll to an import profile by selecting the letter corresponding to the first letter of the normalizer name.
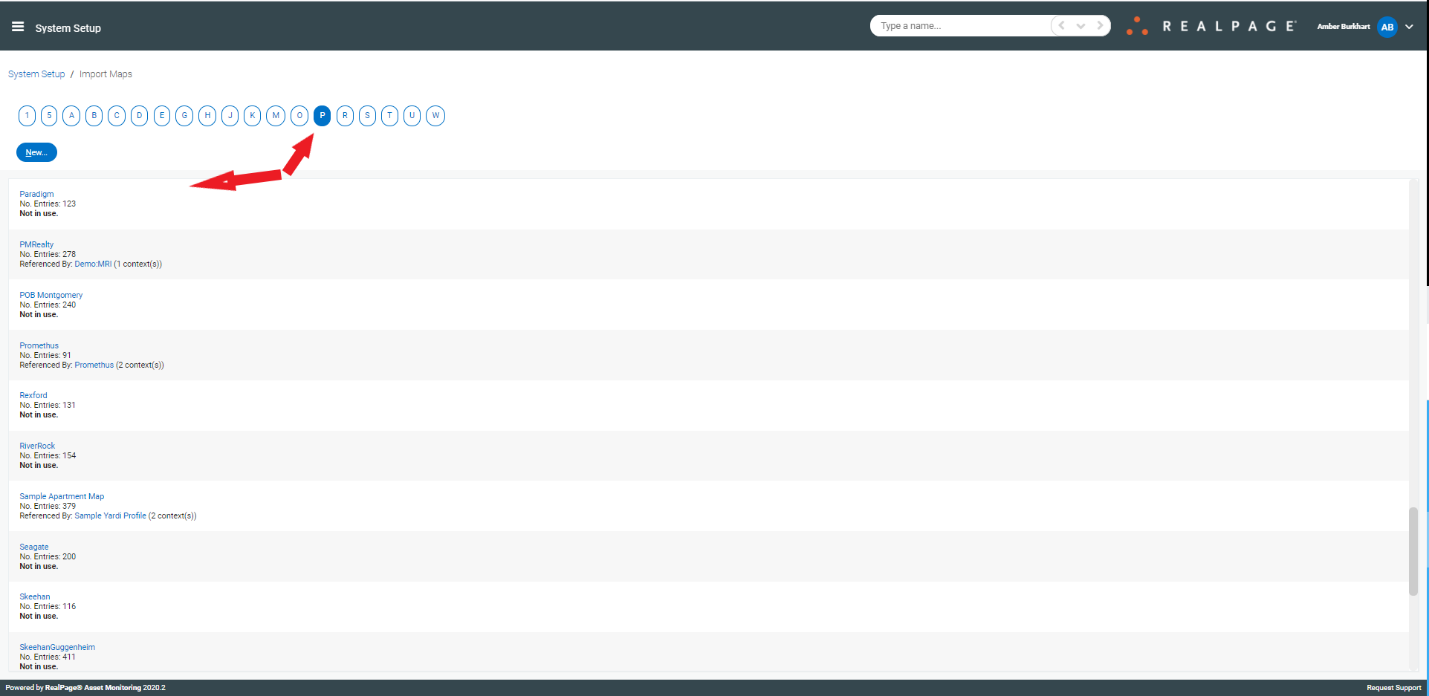
- Click the “New Entry…” button to insert a new mapping entry or click the link of an existing entry to display the mapping details.

- Enter the account number from the partner’s chart of accounts and source account name.

- If the partner groups like accounts and those accounts all map to the same client master account, then enter the beginning number of the partner’s account range in the Map from account and the last number of the range in the Range through field.
- Check the “Ignore this account” if the partner account should be ignored by the importer. Use this if the partner’s trial balance file contains statistical accounts that should not be mapped. Otherwise, when the account is encountered during an import, errors will be displayed.
- Enter the account from the common chart of accounts that the partner account should map to
- Enter the name of the account from the partner’s chart (suggested best practice)
- Enter a description for the mapping (optional)
- Click the Update button to accept the change
In most situations, it will be easier to create the account mapping using Microsoft Excel because the partner’s chart can be copied directly into a template.
- Click the Excel document icon to download the current account mapping into an Excel template. If the map is empty, an empty template will be created.
- Open the downloaded template in Microsoft Excel.
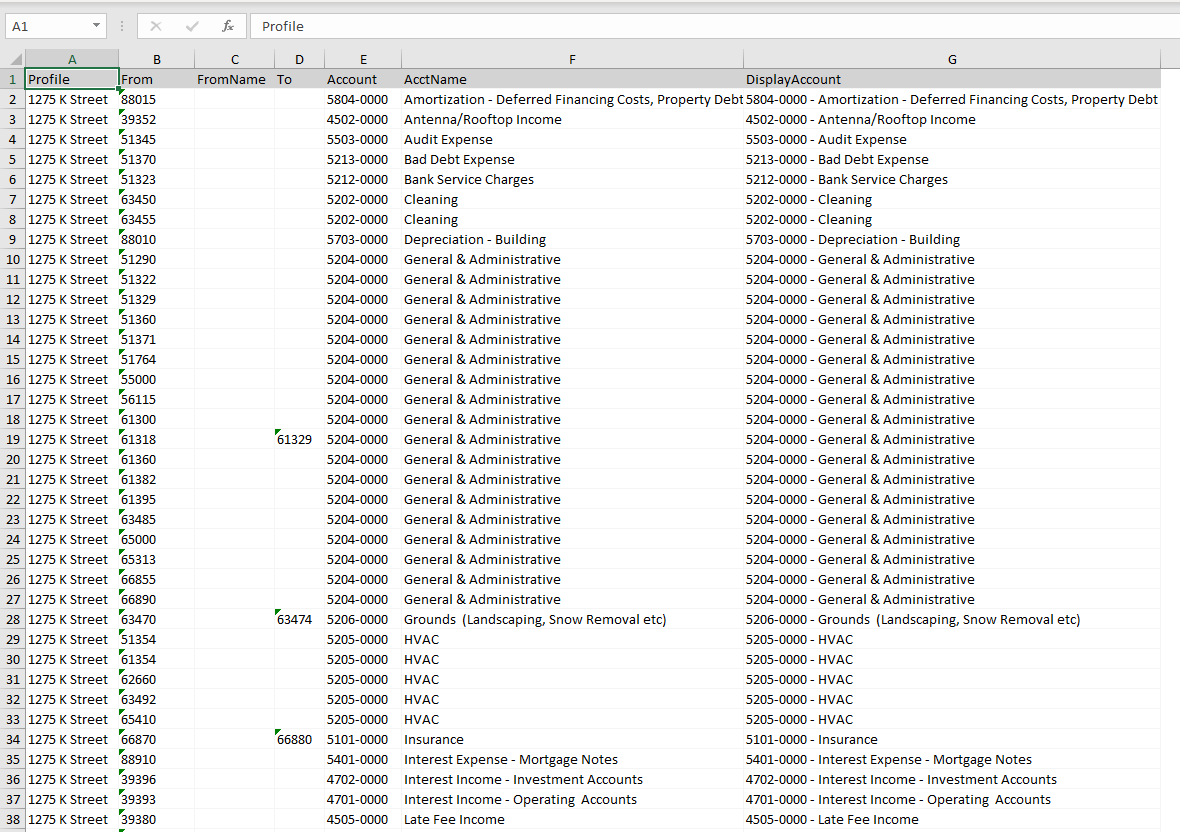 Complete the following columns:
 - The name of the Import Map. You should delete this informational column (A) prior to import.
- Copy the account numbers from the partner’s chart of accounts to column B starting in row 2, rename this column to "FromAccount" prior to import.
- Copy the names of the partner’s accounts into column C, ensure this column is named "FromName" prior to import.
- Delete Column D, "To".
- Enter the account number from the common chart of accounts. To reduce errors, export the master chart of accounts to another sheet and use this field as the key to a VLOOKUP or cut and paste. Rename the column "ToAccount" prior to import.
- Create a formula in column F that performs a VLOOKUP to return the account name from the sheet that contains the common chart of accounts. Otherwise, enter the name of the common account.
- The DisplayName column (G) should be deleted prior to import, the system will generate this information automatically if an export is created.
- Save the file and import it by clicking the “Import…” button on the import map details screen
- Note: An existing import map will be completely overwritten by importing a new mapping template. If you are adding accounts you should pull the full existing template and add the accounts to the full list to prevent losing your existing data.